Huevos Rancheros Redux

Huevos Rancheros Redux

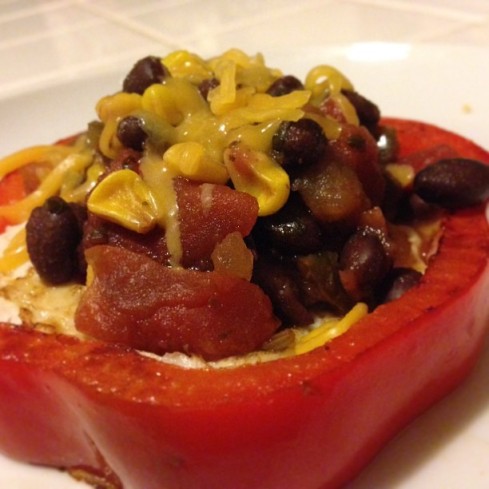
Several days ago, a Facebook friend posted a photo of bell peppers being used as egg rings (no doubt something that’s been making the rounds on Pinterest). With permanently tilted stovetop burners, I use metal egg rings every morning so my eggs don’t stream all the way across the pan. But the idea of edible egg rings stuck with me. The combination of red bell peppers and eggs somehow made me yearn for Mexican food, so I improvised some additions. Here’s the recipe:

Ingredients
1 large red or green bell pepper
2 eggs
1/2 c. of your favorite salsa
1/2 c. canned black beans
1/4 c. frozen corn
2 tbsp 2% shredded cheddar

Directions
1) Slice off the top of the bell pepper. Cut two 1/4″-3/8″ rings from the pepper.

2) Spray a nonstick skillet with a small amount of cooking spray. Cook the pepper rings for about 2 minutes on each side.

3) While the bell pepper is cooking, strain & rinse the black beans. In a small sauce pan, combine the salsa, black beans, and corn and cook over medium heat until warm.

4) Break one egg into each of the bell pepper rings and cook to your liking. I prefer over-medium, so a very thin spatula is helpful for getting under the pepper and flipping without disturbing the egg.

5) Serve pepper/egg on a plate topping with salsa mixture and 1 tbsp of cheese for each.

There are endless possibilities here, so make whatever adjustments will suit your taste buds!


Dog-Nuts: This is what’s wrong with America

Early last week, a friend posted on Facebook that she had a dream that Dunkin Donuts sold hot dogs. My immediate response was, “They totally should. Then they could sell pigs-in-a-donut.” What I didn’t realize is that I had planted a seed in my mind that would not go away until it came to fruition. I googled “pig-in-a-donut,” “hot dogs in doughnuts,” and any other combination/spelling I could think of. Nada. Niente. Nothin’.

Is it really possible that no one has thought of this?! Think about all of the crazy state fair foods that have come to be in the past decade… chicken-fried bacon, deep-fried butter, spaghetti & meatball on a stick, hot beef sundae (no kidding), and the list goes on and on. No pigs-in-a-donut, so I conspired all week-long, gathering different recipes for yeast donuts, kolaches, pigs-in-a-blanket, etc.

I used Alton Brown’s Yeast Doughnut recipe as the base for the dog-nuts. It definitely called for a whole lotta shortening & whole milk and I didn’t hold back. It took a while to get the right consistency for the dough, as it is meant to be much stickier & lighter than typical bread dough. After I let it rise for an hour, I flattened it out to 1/2-5/8″ and cut out discs with a 2″ biscuit cutter.

While this was going on, Katie was cutting the Nathan’s Famous all-beef hot dogs into quarters (about 1.5″) and cooking them a bit in a frying pan with a little water.

Once these were cooled to room temperature, it was time to merge them with the discs of dough. My original plans were to cut an incision in the sides of the dough, but it was so sticky that wasn’t an option. We ended up just wrapping the dough around the hot dogs chunks, completely sealing them in.

I covered them with a light towel and let them rise for another 30 minutes with the hot dogs inside. During this process, I had about 2″ of canola oil heat heating up to 365-375° in our beautiful Le Creuset dutch oven. As it was getting hotter & hotter, we realized we were in need of a candy thermometer, so I headed to the Teeter around the corner.

The first half-dozen of these were a little darker than I would’ve liked, so I decreased the cooking time per side from 1 minute to 30-45 seconds. They came out looking like cute little baked potatoes. And now for the best part… While the dough was rising, I made the glaze. As I was thinking & talking through the whole process over a beer with our friend Daniel earlier in the week, he suggested that the glaze should be honey mustard to unify the hot dog with the doughnut. He was totally right! I simply combined 2 cups of confectioner’s sugar, 1/4 cup of whole milk, 1-1/2 teaspoons of whole grain mustard, 1 teaspoon of yellow mustard (for color), and 1 teaspoon of honey.

The glaze hardened perfectly on the dog-nuts and the mustard seeds not only made them nice and polka-dotted, but also gave a little burst of tang with the sweetness. We had several friends over to try them out and they were a hit!

Since we only used one package of 8 hot dogs, we actually had quite a bit of dough leftover, so I fried the rest of the pieces up and Katie dipped them in cinnamon sugar for the less adventurous in the group.

So, next time you’re at your local state fair or carnival, be on the lookout for Dog-Nuts (or the fancier name Sweet Mustard-Glazed Pigs-in-a-Doughnut)!


The magic IS in the middle!

The Christmas season around here has been a busy one!  Unfortunately, only a small part of the busyness can be attributed to spending time in the kitchen (and blogging about it).  If you’ve been missing us, be sure to like our Facebook page where you will find more frequent snippets about what’s happening in our kitchen.

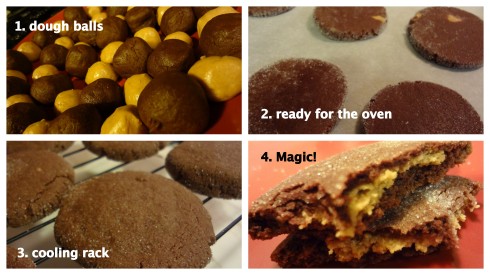
With that being said, today I want to talk about some cookies I made for the first time this holiday season.  Recently, I started following the blog, A Sweeter Thing.  When I saw the post about Magic in the Middle Cookies, I was completely intrigued. I traced the recipe back to its roots and found it originally posted on the King Arthur Flour website (by the way, that is our standard flour of choice).  I read all three versions of the recipe and found little variation, so I got to work.  I won’t bore you with all of the details of the recipe.  I used Skippy Natural peanut butter and Ghirardelli unsweetened cocoa.  The recipe tells you to measure out specific portions of both the peanut butter dough and the chocolate dough, but I just eyeballed the peanut butter dough, then I matched up one chocolate dough ball with each peanut butter ball and I came out almost perfect.  So, no need to sweat over that.  Also, I flattened the chocolate dough a little more before wrapping it around the peanut butter and had no problems with coverage.  If you are having trouble getting the chocolate dough around the peanut butter, you might consider that.

Upon first glance, you might think these look pretty difficult because of the multiple steps involved. However, I assure you they couldn’t be easier.  I put them together one night while Nathan was rehearsing for a Christmas performance and the last pan was in the oven by the time he was finished.  These are definitely worth a go!  We ate a few fresh from the oven, and I set aside some for our dessert during the week.  Then, I packed the rest on to a plate and took them over to the baristas at our favorite Starbucks that Monday morning.  They were well-appreciated!

I have to say that these will definitely go into my regular holiday cookie rotation!


First Adventure in Fondant…

Not a long post, just wanted to share my sister’s latest creation. Thanksgiving Day was Nathan’s sister’s birthday and we didn’t want to let the occasion pass without acknowledging the special day.  So, my sister decided to make an extra special cake to recognize all of those folks who had birthdays around Thanksgiving.  She made the bow from fondant, but the Tiffany blue frosting was a perfect, not too sweet buttercream. The top tier was yellow cake and the bottom tier was chocolate. Yeah, sister bakes good cakes!


Post Roller Derby Delight

Usually, Saturday night results in dinner out.  However, this week, we actually ended up with one more planned meal than we needed.  As a result, we decided that Saturday night we would have dinner at home!  That being said, we already had plans to go to the Greensboro Roller Derby match at six.  So, it was either a super early dinner or making sure that we could put something together quickly once we got home (as we were sure to be starving!)

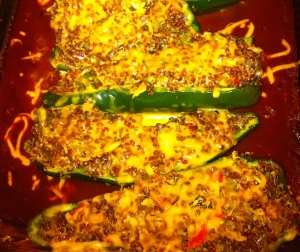
So, while Nathan was practicing Saturday afternoon, I decided to gather things together and get the filling for some Quinoa Stuffed Poblanos  prepared.  We have made these a few times and each time, we feel like the recipe is lacking something.  They just don’t seem to have the right depth of flavor when eaten.  If you  read the recipe, you will see that it calls for tomato juice to be used in the bottom of the pan in which the peppers are cooked.  I had a feeling that if we did something a little different for that cooking liquid, we might like the results.  I had a feeling enchilada sauce might be just the right thing.  We didn’t have much of a choice between sauces at the Teeter, but we found one that was identified itself as organic and had a list of ingredients that you didn’t have to be a chemist to read.  I also bought red quinoa as I just like the texture of it better.  And, Nathan mentioned that he was over his distaste for cooked green pepper and that we should use a combination of peppers rather than just red as we have in the past.  I was sure I was armed with the exact elements I needed to make a fabulous filling for this dish.

I got all of the ingredients–red and green bell pepper, onion, garlic, jalapeno (the recipe calls for 2 teaspoons, I use a whole one), green onions, and cilantro–chopped while the quinoa was cooking.  I sautéed everything put the green onions and cilantro.  When everything was nice and tender, I mixed in the quinoa, green onions, cilantro, some lime juice and soy sauce.  Then, I just set the whole lot aside to cool so I could put it in the fridge until we were ready to stuff the peppers.

Now, here’s a side note…this was our first trip to a Greensboro Roller Derby match.  We’ve been wanting to go for a while, but our schedule never seemed to allow it when there were matches.  This time, we had a Groupon and we were determined to get there!  We met up with our friends Andy and Preston while we were there and loved every minute of it.  If you live in Greensboro and haven’t gone yet, you definitely should check one out ASAP!

Once we got home, I halved the peppers, cleaned them and filled each with about 1/3 cup of the filling.  This is when I noticed one big error.  We had been so cautious about the ingredients in the enchilada sauce we chose, that we failed to notice the word “HOT” on the front of the can.  Big oops there.  Nathan can handle the heat quite well.  I can take a good amount, but if a dish is too hot, I really can’t eat it. At that point, half the peppers were stuffed and in the pan, so I just crossed my fingers and hoped for the best.

Into the oven they went!  After about 20 minutes I pulled the pan out, sprinkled some shredded cheddar on them and then put them back in for another 10 minutes.  The flavors worked perfectly!  The spice ended up not being too heavy for me after they cooked, although I didn’t drizzle nearly as much sauce on mine as Nathan did on his.  But, we definitely thought the enchilada sauce was an ideal substitute for the tomato juice.  This one will definitely stay in our regular meal rotation!


Trial and Error

If you’re a frequent reader of our blog, you’ll know that this week, I made it my mission to produce homemade pizza for the first time. I had a batch of research in my arsenal, a promised killer recipe for dough, and a list of amazing toppings in my head. Most of the time, our food kicks ass. Unfortunately, my first pizza did no such thing.

I entered the kitchen with confidence.  I was sure this was going to be amazing.  And, as I opened the kitchen cabinet to gather together the ingredients for the pizza dough, a brilliant vision came into view: whole wheat crust.  We go to Brixx every so often, and I always order their wheat crust.  I knew that different types of flour produce different results when it comes to getting some good old raw gluten, so I thought a half and half mix would be the best way to go.  That would contribute some easy to break down white flour in the mix.  I got the flour mixture ready while I set the yeast, sugar, and water aside to do their thing.  Almost as soon as I started my stand mixer and began incorporating the yeast mixture, I could tell the results were not going to be exactly what I was hoping for.  The mixture was dry and crumbly, so I began to add water, just one tablespoon at a time.  It only took a few tablespoons before the dough formed a good ball.  It felt a little dry to the touch, but I really attributed that more to the texture of the wheat flour than to anything else.  So, I added the olive oil and kept up the process.

When I dumped the dough onto my white flour dusted board and started to knead I knew it still wasn’t right.  The dough still wasn’t sticking together well enough and it was really hard to manipulate.  Still, I persisted.  I was sure that if I could just break down those proteins enough, I could get a good thing going.  When the ball started to smooth out, I gave a bowl a good oil, made sure the dough had a light coating of it and covered it to rise.  My hope was that the rising process would help soften the dough up a little more so it would do everything I was hoping for.

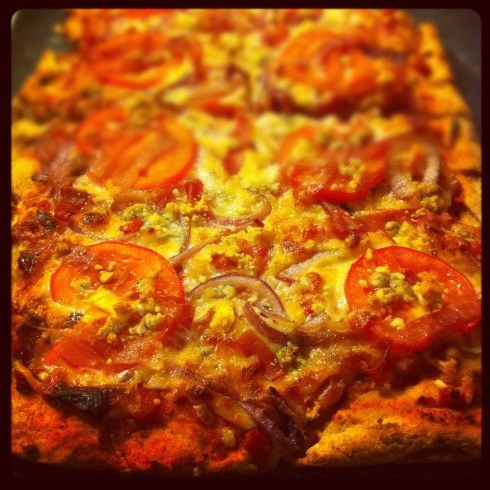
Now, let me talk for a moment about what really worked with this pizza…the toppings!  As soon as I started thinking about making a pizza, I started contemplating topping ideas.  I wanted something between completely traditional and the kinds of toppings we frequently encounter at another of our favorite pizza joints, Sticks and Stones.  I definitely wanted a tomato sauce base.  Most of the time, that is a pizza non-negotiable with me.  I also knew I wanted some kind of protein, but nothing too high maintenance and a blend of mozzarella and some sort of non-traditional cheese.  So, while the dough was rising, I put a head of garlic in the oven to roast.  Then, I put about a tablespoon of olive oil in a pot with a teaspoon-ish of dried Italian seasoning (I couldn’t justify buying a bunch of fresh herbs for pizza sauce.)  Once that got toasty fragrant, I poured in a 28 ounce can of crushed San Marzano tomatoes (yeah, I know these actually come from California, but they are still my favorite).  I brought it to a simmer, left it for about 10 minutes and then pulled it off the heat and set it aside (and I have enough sauce left for 3 more pizzas).  While that was simmering, I slivered a red onion and put it in a saute pan with olive oil over low heat to caramelize.  I dug in the fridge and was thrilled to discover some prosciutto we had left over from a veggie dish the night before.  I cut that into strips and sliced a tomato super thin.  Once the garlic was out of the oven and the onion was finished cooking, it was time to deal with the dough again.

When I pulled the towel off the top of the bowl, it looked like things had gotten considerably better. The dough looked much lighter and I was sure it was going to stretch out perfectly for the pan.  But, after I separated the dough into two parts and attempted to stretch it, I could see exactly how wrong I was.  It was pretty stiff; to the point that I had to go ahead and pull the preheated cookie sheet out of the oven so I could use it to press the dough out enough for the pizza.  However, I finally got it pulled out and was able to top it.  It actually looked pretty good going into the oven.

After about 18 minutes in a 450° oven, the pizza was ready.  The crust rose slightly, but overall, it was not even close to what I had desired.  It was crispy on the outside and was definitely cooked all the way through.  It wasn’t dry, it was just…dense.  This pizza wasn’t close to inedible, as I mentioned before, the toppings really worked.  It just wasn’t all I hoped for.  And, it actually looked pretty nice.
I’m not giving up, I’m still after the perfect homemade pizza.  And no, I’m not willing to give up the whole wheat crust!


Chocolate Wars

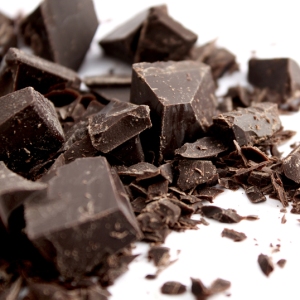
Chocolate. So many varieties vying for our attention as we browse the wall of sweetness during our weekly Earth Fare excursion. Always dark chocolate, but what percentage cacao? Almonds & sea salt? Hazelnuts & currants? Bacon? How does one choose?

Easy.

Nearly a year ago, when Katie & I started cooking so many more meals at home, we decided at some point that we needed a bit of sweetness at the end of these delicious meals. Both of us are constantly in a state of training for a race – whether a 5K, half marathon, trail race or the full 26.2 miles – so we’re usually very conscious of what we ingest. Thus was born the weekly chocolate bar tradition. We decide on one bar and each have a little piece of it after each dinner we cook at home, spreading it throughout the entire week. It’s usually so rich that that’s maybe all our taste buds can handle after a rich & savory meal.

So, this allows us to try up to 52 different varieties of chocolate bar each year. No need to fret over making the wrong decision. There’s always next week!

Here’s a brief list of some of our favorites that are in regular rotation:


Contemplating Homemade Pizza

A few weeks ago, our friend Brian (the same one who made the Swiss Chard and Lentil Stew for us) posted the pizza dough recipe he uses on Facebook. Since then, I’ve been considering making pizza for dinner one night. But here’s the hangup. I’ve never done it before. We don’t have a pizza stone, so I’m not sure how the crust will come out on just a cookie sheet. Anyone have any helpful hints?


Tastes Like Fall

Fall means many things for me, but food wise, it means roasting food. This past weekend, we went with a pretty traditional Sunday dinner: roasted chicken with roasted winter vegetables and some lemon-parsley orzo salad.

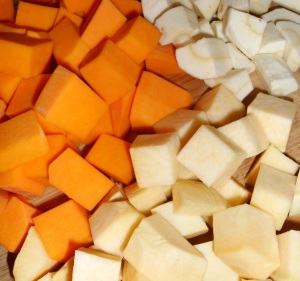
We bought a 4 pound organic chicken on our expedition so we would have plenty of leftovers for chicken salad. For the veggies, we went with butternut squash (which to me, just oozes fall), turnips, and parsnips. One of our favorite side dishes for the last few months has been a Pine Nut & Lemon Orzo. Nathan suggested that and I knew it would brighten everything up and tie into the lemon I was planning to use in the seasoning for the chicken (plus we had everything we needed for it without adding anything extra to our grocery list).

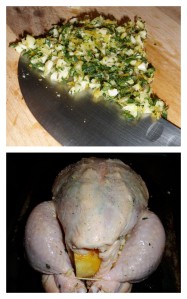
I realized as I was getting things together that it has been a couple of years since the last time I roasted a chicken. I definitely do not intend to let that happen again. I started by chopping together some garlic, thyme, and lemon zest. Once that was finely chopped, I used my fingers to create space between the skin and breast of the chicken and stuffed that into the space. I brushed the skin of the breast with a little bit of olive oil and dusted it with salt and pepper. I cut the lemon I had zested in half and jammed that into the cavity of the chicken before putting the roasting pan into a 375 degree oven.

Once the chicken started roasting I knew I had about an hour before I needed to have the veggies ready to go. So, instead of getting right to work on those, I went ahead with the orzo. This is a salad that really needs to sit for a couple of hours and it makes a HUGE batch. We usually half the recipe and still end up with orzo for days. It definitely gets better after a day or two in the fridge. So, letting it sit for an hour or two after mixing it up is essential.

When that was done, I prepared the veggies  with a simple peel and chop. Normally, when I roast veggies, I toss them in olive oil and some seasoning. However, I knew that with the amount of seasoning I had put on the chicken that the veggies would get plenty of flavor from the pan juices.Once the chicken had been roasting an hour, I added the veggies to the pan and tossed them around in all that goodness.

I put everything back into the oven for another 40 minutes. After 40 minutes, the chicken was ready to come out for a rest. I put it on a separate plate and tented it while I threw the veggies back into the oven for another 10 minutes. When they came back out, I sliced us both a good size piece of breast meat, scooped up some of the orzo and veggies and we dug in! We paired this meal with a Grand Vieux Chateau du Roi from one of our local wineries. It was the perfect end to a beautiful fall day!

NOTE: Everyone knows we love leftovers! See exhibits A & B.  This week, Nathan used the leftover chicken to make his curried chicken salad with craisins and almonds. I was a little too zealous with my purchase of veggies, so we had extras of those too. Nathan used the extra turnip and parsnip in his roasted potato mix for a dinner later in the week and I picked up some broth so I can roast off the leftover butternut squash with some carrot and onion and make soup this weekend. YUM!


Runner Girl Book Club

Once a month, a group of girls I met through running get together to “discuss” a book we have all “read.”  This month’s read was Pride and Prejudice and we were all quite proud of Karson for getting through the book.  Several others in the group have read the book more than once, so we had about a 30 second discussion of the challenge presented by Austen’s use of language on a first reading and the values of women during that period of time.  The rest of the time we spent chatting about our lives and catching up now that we are no longer all part of the same training group.

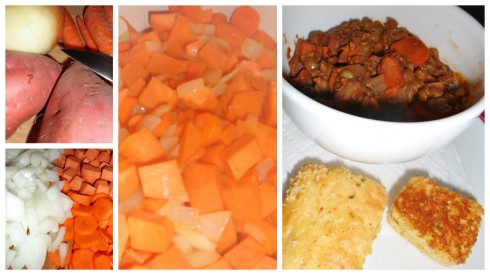
I volunteered to host this month because I knew Nathan would be out of town and wouldn’t feel overrun by the women.  Since there are a couple of vegetarians in the group and we are all careful about what we eat, I decided to make the Sweet Potato and Lentil Chili I made two weeks ago.  The most difficult thing about this recipe is the time it takes to chop things up.  After that, it’s a breeze.  I chopped up one onion, 2 sweet potatoes, and 4 carrots on my large bamboo cutting board so the majority of the ingredients would be ready.  I dumped the onion into my Le Creuset with a bit of olive oil and began to saute it.  Once it was getting slightly soft, I put in the rest of the veggies and started cooking those.  You actually let all of these veggies cook together for about 15 minutes so the sweet potatoes and carrots soften up quite a bit.  While that was cooking, I minced one jalapeno, sans rind and seeds.  I also measured out my spices. This chili gets a tablespoon each of cinnamon and smoked paprika and 2 tablespoons of chili powder.  The first time I made it, I was leery of that much cinnamon.  I was really afraid it would overpower the dish.  But, with the sweet potatoes and the smokiness from the paprika, it is just the right amount.  The recipe calls for the spices to be put in at the same time as a box of veggie broth and a can of tomatoes. But, since I like to toast my spices a bit, I added them in with the jalapeno right at the end of my 15 minutes of cooking all the veggies.  Once I stir all of that together, I put in the wet stuff along with a cup and a half of lentils.

The first time I made this, I only had red lentils.  And, since I was careless and only skimmed the recipe before shopping for ingredients I missed the part that said that red lentils would turn to mush.  They definitely cooked way down, but to me, it didn’t really effect the quality of the chili that much.  Of course, now that I’ve had it made “correctly,” I’m pretty sure I’ll always use the green lentils to make this dish.  They just gave it a lot more body.

After all of that gets added, you just have to bring it to a boil, then turn it down, cover it, and let it cook until the lentils are tender (about 45 minutes).  While that was going on, I cheated and doctored up some cornbread mix to make Jalapeno Cheddar Corn Bread.  I grew up on the sweetness of Jiffy Cornbread and still prefer it to other types of cornbread when I’m just eating it on it’s own.  So, I followed the directions on the box to make it, but I used paper towel to remove the moisture from some pickled jalapenos, diced them up, and threw them in the batter along with a couple of handfuls of shredded cheddar cheese.

One of the girls brought honeycrisp apples, red grapes, and smoked gouda for our appetizer and another brought a salad with mixed lettuce, more apples, walnuts, red onions, and feta.  We started with a bottle of pinot noir and finished the apple pie and vanilla gelato that someone else brought with a bottle of pinot grigio.  I wish I had pictures of the spread, but once the wine started flowing, I kind of forgot about the camera.

All in all, it was an amazing night!  I can’t wait to cook for my runner girls again!